Healthy, Hearty Cranberry Apple Oatmeal Cookies

We’re gripped in a polar vortex; it’s cold, dark and dreary outside- what’s a boater girl to do?  Rather than pining away for my boats, I’ll perfect some boat friendly recipes during the off season.  And, okay, maybe there’s just a little bit of pining happening as well, but . . . sigh . . . nothing I can’t manage.  

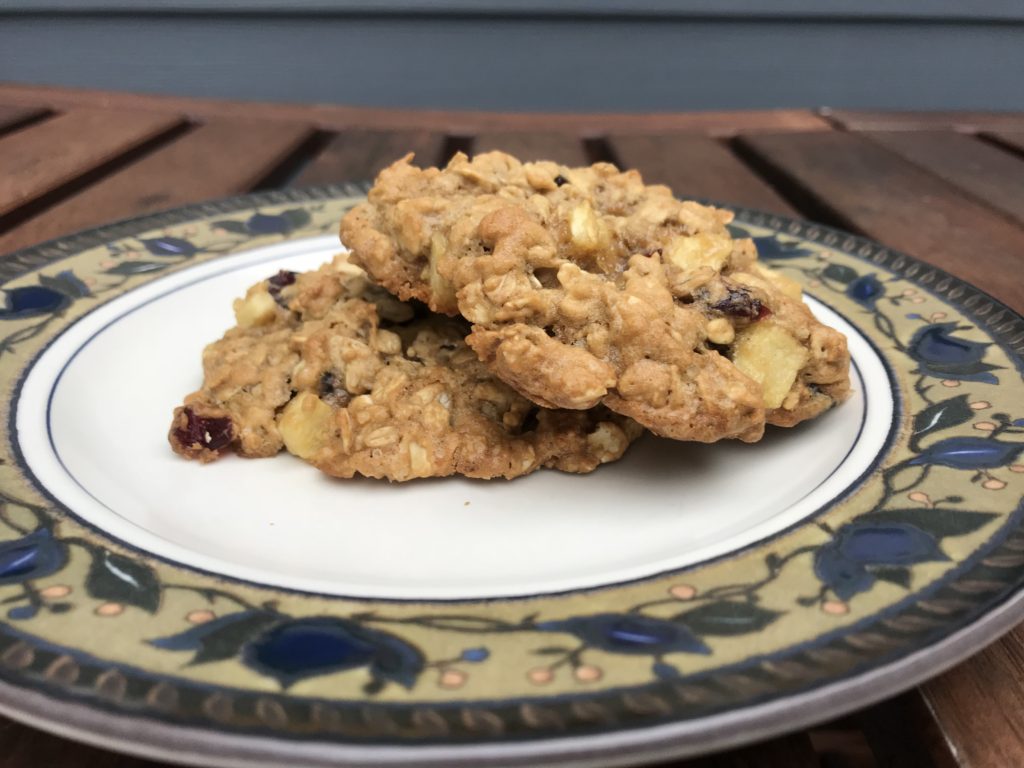
Here’s a recipe that my colleagues have been asking me to publish for quite some time (yes, Beth and the 18th floor, this one’s for you!)  This recipe takes oatmeal cookies to a whole new level (or so I’ve been told), and these are reasonably healthy so you won’t feel guilty about feeding them to the kids for breakfast.  What’s more, because they’re compact and portable, they are easy to grab on the way out of the house in the morning (or as a snack for a boat ride).  

Ingredients   

  • 14 tablespoons of butter
  • 3/4 cup firmly packed light brown sugar
  • 1/2 cup white sugar
  • 2 eggs
  • 1 teaspoon vanilla
  • 1½ cups all-purpose flour
  • 1 teaspoon baking soda
  • 1 teaspoon cinnamon
  • pinch of nutmeg
  • pinch of salt
  • 1¼ cups of dried cranberries
  • 1 medium-sized golden delicious apple
  • 3 cups of Quaker Oats, uncooked
  1. Preheat the oven to 375 degrees.  The oven must be hotter than for typical oatmeal cookies so the extra moisture from the fresh apples evaporates.
  2. Beat the butter and sugars in a stand mixer until creamy.  Scrape down the sides of the bowl periodically to make sure the ingredients are thoroughly combined.
  3.  Add the eggs and vanilla to the stand mixer and beat until combined.
  4. In a separate bowl, combine the flour, baking soda, cinnamon, nutmeg, and salt.
  5. Add the flour mixture to the wet ingredients and mix thoroughly using the stand mixer.
  6. Add the oats and mix them into the dough on slow speed.
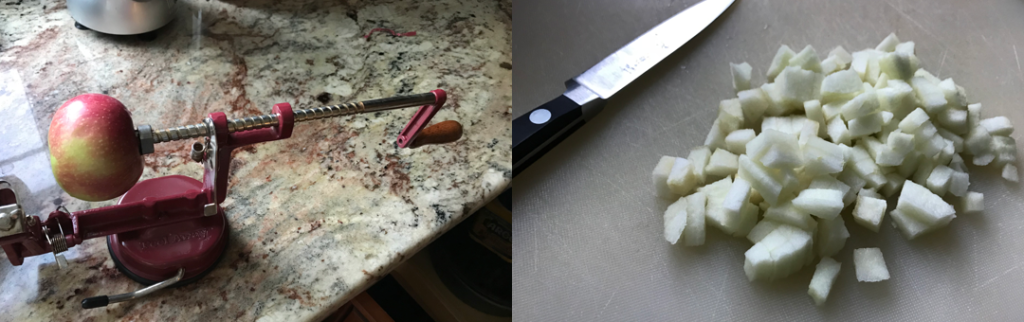
  7. Core and peel the apple and cut it into ¼ inch squares.  I core and peel the apple using an apple peeler/corer device and then slice up the rings into smaller pieces (see below).
My apple peeler/corer device (though not with a golden delicious apple) and apples chopped to the correct size for these cookies

8. Add the apple pieces and cranberries to the dough and mix them in by hand.  Mix the cookie dough just enough to evenly distribute the fruit.  If you overmix it, the dough will become soggy from juice released by the apple slices, which makes for soggy cookies.

9. Drop tablespoons of cookie dough onto a nonstick baking sheet.  Bake the cookies for 10-12 minutes until they are golden brown and firm. Cool the cookies on a wire rack.

The cookies should keep for about one week.  They also can be frozen and thawed as needed. Enjoy!

Sunset-Inspired Peach Tart

A little retooling, and this dessert passed the boat test!

My blog-worthy recipes must pass the Boat Test.  For those who are wondering, the Boat Test is simple: can it be served on a boat with minimal aggravation/ mess/ cleanup? And perhaps boat-testing my recipes is yet another excuse to get out on the water . . .

The first time I made this tart, it soundly failed the Boat Test, which was, of course, on the Long Island Sound.  The crust isn’t crumbly, which makes it easy to cut up and serve, but the peaches all slid to one side in transit, peach juice leaked everywhere, and when I momentarily lost my balance, 
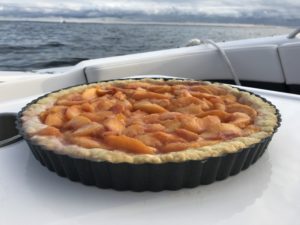
half the filling ended up on the bow, instead of in our bellies.  Peaches release lots of juice when they bake, and too much liquid made this dessert unseaworthy.

I went back to the drawing board and tried another approach.  This time I cooked the filling separately on the stovetop before I put the tart in the oven. I also added tapioca starch to thicken the filling.  Version Two was a keeper, and its colors mirror a sunset over the Long Island Sound, so it is the perfect complement to a sunset cruise with friends.

For the Crust*

  • 2 cups of unbleached all-purpose flour
  • ½ tsp baking powder
  • A tiny pinch of salt
  • ½ cup of sugar
  • Zest from one medium-sized lemon
  • 2 large eggs, beaten
  • ½ cup of oil
  • 2 tsp warm water
  • One 11 inch round tart pan

*The crust is a riff on my high school best friend’s grandmother’s Hamantaschen recipe.  Her recipe can be found here: https://dinersjournal.blogs.nytimes.com/2009/03/09/the-perfect-hamantaschen/  Thank you, Debs!

For the Filling

  •  10-11 Yellow Peaches (any free stone variety), peeled
  • ¾ to 1 cup of sugar to taste
  • 1 tsp lemon juice
  • ½ tsp cinnamon
  • ¼ tsp of nutmeg
  • 2 tablespoons tapioca starch
  1. Combine the flour, baking powder, salt, sugar and lemon zest in a large bowl and stir to combine.
  2. Add the eggs, oil, and water. Stir to thoroughly combine.
  3. Form a flat, round disk of dough and wrap it in parchment paper. Refrigerate the dough for 1 hour.
  4. While the dough is chilling, combine all the filling ingredients except for the tapioca starch in a saucepan.
  5. Bring the ingredients to a boil over medium heat, stirring continuously, and cook them at a simmer for 3-5 minutes until the peaches look golden like a 
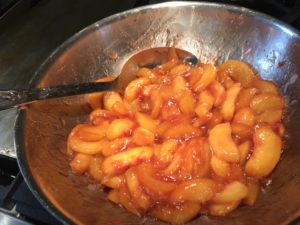
sunset and are cooked through (see photo to the right).They will release a lot of peach juice.
  6. Turn off the heat and pour the peach juice into a large Pyrex measuring cup.
  7. Reserve ¼ cup of peach juice. The rest can be saved to use as an ice cream topping, pancake syrup, etc.
  8. In the measuring cup, mix the tapioca starch with the reserved peach juice, and pour it back into the saucepan with the peaches.Reheat the peaches on low for about 1 minute until the peach juice thickens.
  9. Put the oven rack in the lower middle position. Preheat the oven to 375 degrees.
  10. Roll out the dough on parchment paper until it is a ¼ inch thick round crust. The dough might feel oily.  Don’t worry; it will not be oily when cooked, and the oil helps to create a barrier between the filing and the crust, which keeps the crust from getting soggy.
  11. Lift the parchment paper and turn it upside-down to flip the dough into the tart pan. Repair any broken edges and spread the dough so it meets the top of the tart pan.
  12. Spoon the filling into the crust, and bake the tart for 18 to 20 minutes, until it is golden.
  13. Cool the tart thoroughly before serving it on or offshore.

Chicken Satay

I made this dish in Seattle for our picnic on Lake Washington.  It’s easy to prepare in advance, and it tastes good either warm or cold.  It’s also a good go-to recipe for school pot-lucks or picnics.

Ingredients

  • 1½ pounds chicken breast tenders (you can also cut boneless, skinless chicken breasts into strips)
  • 1 onion, chopped
  • 3 cloves of garlic, minced
  • 2½ tablespoons of soy sauce
  • 1 tablespoon of fish sauce
  • Juice from 1 large lime (or 2 small limes)
  • Black pepper to taste
  • Bamboo skewers are optional
  1. Combine all ingredients except the chicken in a plastic Ziploc bag and give it a good shake to mix everything up.
  2. Add the chicken, shake it again, and let it marinate for at least 2 hours or overnight. I seal the bag and put it in a rimmed baking sheet in the fridge so the marinade is evenly distributed, and just in case the bag starts to leak.
  3. If you are putting the chicken on bamboo skewers, soak them in cold water for at least 20 minutes. Then put the chicken strips onto the skewers.
  4. Preheat your broiler and broil the chicken until it is cooked through to an internal temperature of 165°F (approximately 7-10 minutes). Alternatively, you can cook these on the grill.


Boat-Friendly Blueberry Pie

(makes 10 individual pies)

I’ve been trying to develop some boat-friendly recipes for entertaining on the water.  Pie is messy to cut up and serve on a boat (we tried), so I created this recipe for individual pies that can be served to your guests with or without plates (though I recommend lots of napkins).  They can be made one day in advance and refrigerated.

For the crust:

  • 1¼ cups all-purpose flour
  • A pinch of salt
  • 1 tablespoon of sugar
  • Zest from one small lemon or to taste (I use a Microplane to zest the lemon)
  • 10 tablespoons of cold unsalted butter, cut into cubes (I use high quality grass fed butter, such as Kerrygold or butter from my local farmer’s market)
  • 2-4 tablespoons of cold water
  • Cooking spray
  1. Throw the flour, salt, sugar, and lemon zest into a food processor.  You can grate the zest directly into the food processor’s bowl.  Pulse to mix the dry ingredients.
  2. Add the butter and pulse until the butter is broken up into small pieces and the ingredients have the consistency of dry sand.
  3. Add the water slowly while pulsing until the dough just starts to clump together. Stop when it looks like wet sand.  Don’t over-process the crust.
  4. Turn the crust crumbs out onto plastic wrap, form them into a flat disk, wrap it up, and refrigerate the crust for at least one hour before rolling it out. It can also be refrigerated overnight.
  5. Roll out the crust.  Easy cleanup tip:  Roll out the crust on a sheet of parchment paper to keep the countertop clean. 
  6. Use a glass with a wide mouth to cut circles of crust that are large enough to fit into the cups of a muffin tin (see below).

Spray your muffin tins with cooking spray and fit the disks into the cups.  I throw the filled muffin tins into the freezer for 10 minutes before putting them in the oven.  This helps the butter in the crusts firm up again before they are baked.  Poke a few holes in the bottoms before baking.

Bake the crusts at 375 degrees for 15-20 minutes (until they are golden brown).  They may shrink down from the sides of the muffin cups, which is fine.

For the filling:

  • 3½ cups of blueberries, washed and picked over
  • ½ to ¾ cup of sugar
  • 1 teaspoon of Sure Jell fruit pectin (original)
  • Cornstarch slurry (2 tablespoons of cornstarch mixed with 2 tablespoons of water)
  • ¼ teaspoon cinnamon
  1. Puree 1½ cups of the blueberries.  Easy cleanup tip: Use a Nutrabullet instead of a blender for easier cleanup and to save dishwasher space.
  2. Add the pureed berries, sugar, and pectin to a medium saucepan.  Stir occasionally over medium heat until the mixture just begins boiling.  Increase the heat to medium-high and boil until the sugar and pectin are dissolved (for about 1 minute).  Then add the cornstarch slurry and stir until the slurry is fully dissolved.
  3. Remove the saucepan from the heat and skim off any foam that formed on top of the mixture. Mix in the cinnamon.
  4. After the mixture cools for 5 minutes, add the remaining blueberries and stir to combine.
  5. Once the crusts are completely cooled, gently lift them out of the muffin tins with the blade of a sharp knife, spoon the filling into them, and you are done!